


Break it down for me fellas
Just for grins, I decided to scan in a recent strip in its various stages of completion, just to show you what goes into a typical Cool Jerk comic.
Sketchbook sketch
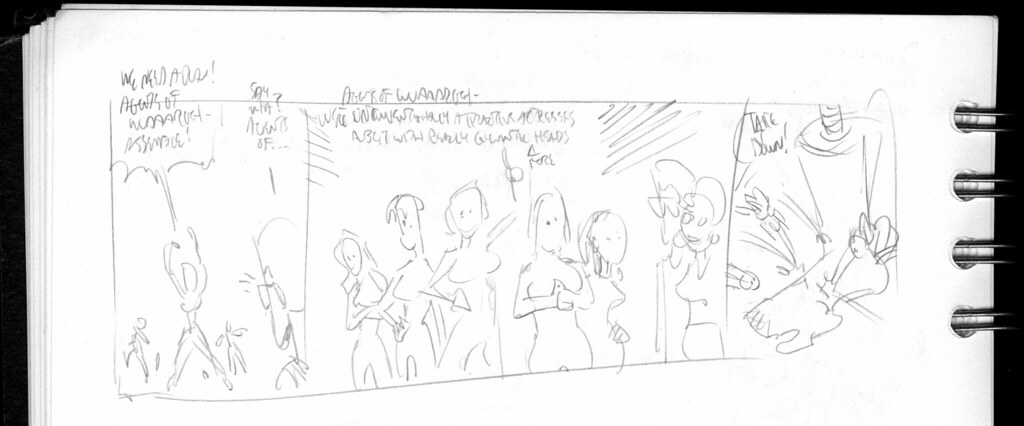
Click it to enlargify it!
I wish I used my Cool Jerk sketchbooks more like other artists and cartoonists, filling pages with character studies, still life studies, reference drawings, etc. Instead, I usually cram 2-4 strip roughs per page. I’ve been doing this since the first Like, For Shore! strips in 1987. Ninety-five percent of the time I just jot down basic dialogue and crude shapes to help me envision who is saying what and where (the other five percent gets more fleshed out).
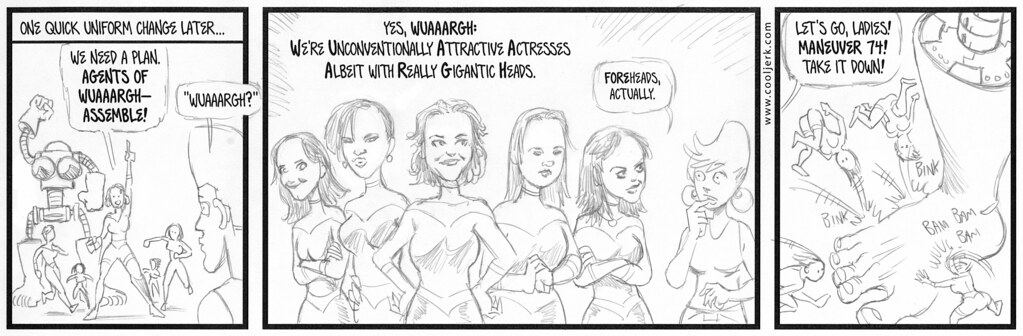
Sharpie scribbles

Click it to enlargify it!
At this point I jump to the Mac. In this example, I went to a FreeHand three-panel template with panels 2 and 3 merged into one. I type up the dialogue in Hornopolis and arrange the composition. After printing out the panels with the dialogue, I take it AND a sheet of thick, coated paper and head to the lightbox. There, I use a purple ultra-fine-point Sharpie and scribble out basic composition onto the coated stock, using the panels printout as a guide. (In the image above, I merged the panels and the scribbles, showing you a close representation of what I see on the lightbox) This stage is where I determine if I need to make adjustments to the panels and dialogue. For example, you’ll see little arrows here and there, noting where text or artwork needs to move.
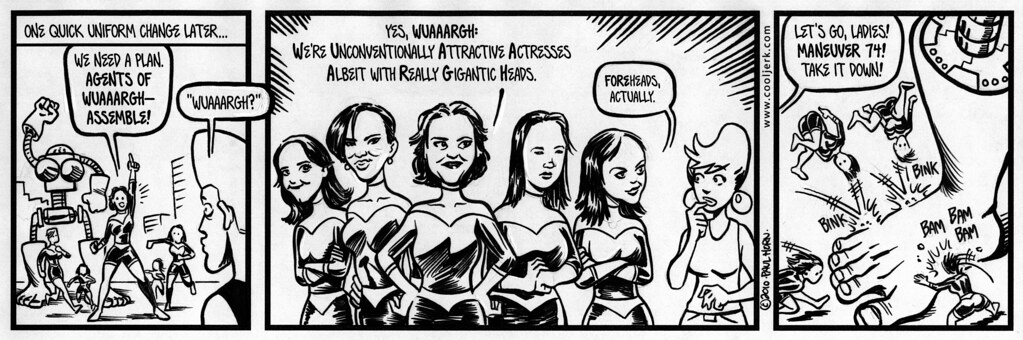
Pencils
Click it to enlargify it!
Back to the Mac: I make final compositional and text edits (notice the changes I made to the first panel). Next I print out the FINAL strip on special paper that prevents ink from wicking. I take it and the Sharpie scribbles to the lightbox and reverse the order, this time penciling the artwork onto the latest print while using the Sharpie scribbles as a guide.
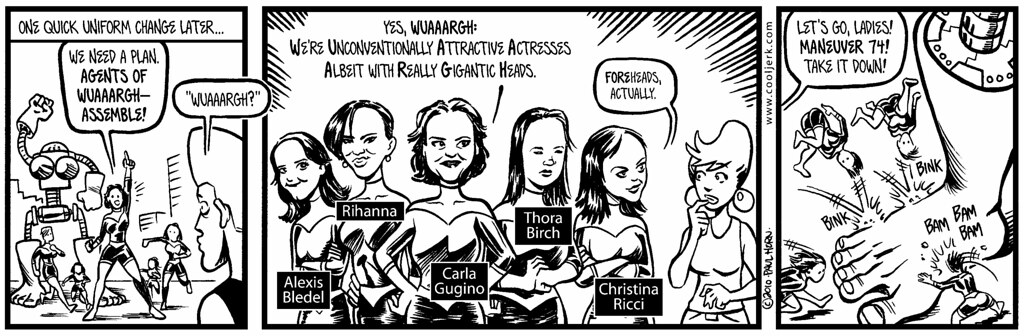
Inks
Click it to enlargify it!
The most time-consuming stage is the inking, which I do with a 000 Robert Simmons watercolor brush and a special cocktail of Koh-i-noor India inks. India ink is permanent and every line counts. If I’m sloppy or jittery from caffeine, I introduce errors to the artwork. That means I have to spend more time afterward cleaning up the art with Pelikan Graphic White (a special opaque white paste that — once watered down — I apply via brush to correct mistakes or add “white effects”). I also use Sakura Pigma Micron pens for fine line work (like backgrounds) and my signature, which I always save for last.
Post-production
Click it to... oh, you know.
I scan in my original as a 600dpi grayscale TIFF. From there, I rotate the image to an exact 180° axis (sometimes no more than 0.02° rotation — yes, I’m that anal) and crop. I convert the 12.4MB grayscale file to a 1.55MB bitmap file, which knocks the comic into stark black-and-white. This allows for easy Photoshop corrections with the Paintbrush tool and Wacom pressure-sensitive tablet. Sometimes I need to add graphic elements on top of the artwork, like CENSORED or text boxes (see above), so I create those in FreeHand and pull them into Photoshop. Once it’s 100% finalized, I save the “master” file AND make a 72dpi .gif copy for the website. So what you see online is nowhere near as detailed and crisp as the version that makes it into the book.
For more information on the process, go here!
My girlfriend actually turned me to your site. One of her blog friends is a friend of yours. Kirbiecravings.com I really like how you broke down your process. What is the time frame that you work with when you do your comic strip? Do you do a bunch of ideas at one time and just churn them out or do you go from one idea to completion to the next idea? I also think its pretty nice that you actually have a physical complete inked version in the end. Do they count as originals if you’ve gone through the process of printing them out and then going over it at the lightbox?
Thanks for sharing from the Professional’s perspective!
Great stuff, my friend!
@Don: Time spent on each strip varies, but the vast majority are turned around in about 3 hours (like my example — from sketchbook idea to 600dpi “master” file). The Sunday-sized strips take closer to 5-6 hours, and I rarely start/finish in the same day. I also rarely do more than one strip per day, but there are times that I’ve done 3 or 4. When that happens, it’s usually when I have penciled strips on deck from the day before, so I just spend the day doing brushwork and digital clean-up.
My originals are true originals; I lay inks right on top of the pencils, then erase any stray pencil lines. I only use the lightbox to compose the initial Sharpie scribbles, and again to compose the pencils using the Sharpie scribbles as guides. Thanks for your questions!
@Charles: Thanks, and thanks for reading, pal!
[…] This post was mentioned on Twitter by justJENN designs. justJENN designs said: Check out this interesting breakdown of a @CoolJerk comic strip process from start to finish! http://bit.ly/ceIbjl […]
All this time I thought you used Photoshop templates and just traced the same figures over and over. 😉
This blog post sponsored by Sharpie™! 🙂 Very cool, “jerk!”